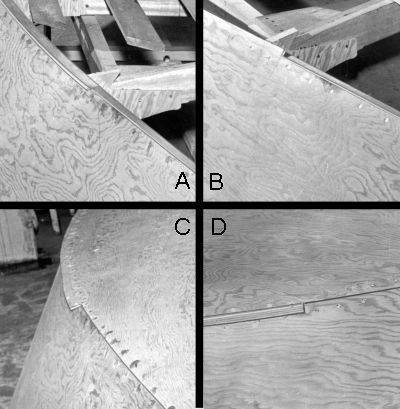
TRANSITION JOINT: These four photos illustrate the transition joint.
A Depicts the transition joint after the side planking has been applied. Note that forward of the cleft, the side planking is fitted to the line on the chine. Aft of this position, the planking is left projecting above the chine.
B Shows this same area after the projecting plywood planking has been faired, flush to the chine.
C Illustrates the appearance of the joint after the bottom planking has been applied. Observe that the portion forward of the bottom planking butts to the side planking. Aft of this area, an abrupt transition is made and the bottom planking laps the side planking.
D Shows the finished joint, as viewed from the side. The transition point is clearly illustrated, the area forward being butt joined, the portion aft, lap joined.

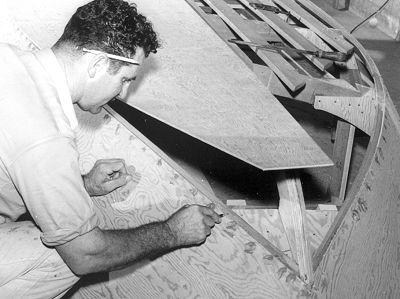
TRANSITION JOINT: One method of marking the line on the bottom panel, forward of the transition joint, is to coat the sharp edge of the side panel with chalk or crayon. The bottom panel is bumped on this edge to transfer the line to the underside of the bottom planking for subsequent cutting. NEXT