Pour Your Own Keel
By Mark LeMahieu
Page 3
The steel propane tank wall was about 3/16" thick, nice and heavy to support the weight when hot.
The bathtub was on concrete blocks. As a safety issue I was concerned that adding firewood or heat would weaken the blocks and cause it to fall or that bumping it would cause sloshing. Propane tanks have feet that you can set them on so I welded the 2" pipe on it for legs. Now the tank was one piece. By setting it on a concrete block in the ground it was more difficult to tip, the block remained cooler, and the tank being enclosed gave one at least a chance to get clear if it did tip.
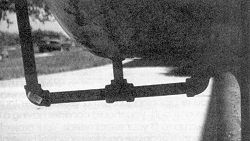 I made two drain holes in the
mold, which greatly increased the strength of the drain. By extending the drain
above the tank there, are no mechanical devices to fail. I made two drain holes in the
mold, which greatly increased the strength of the drain. By extending the drain
above the tank there, are no mechanical devices to fail. |
The bathtub setup had a problem leaking at the drain. I drilled 2-3/8" holes about 12" apart at one end for the molten lead to run out. Then I welded a 1" length of the pipe at each hole. An L and T fitting connected the holes together and the drain ran out just past the end of the tank. By making the pipe connections first with an assortment of threaded pipe I didn't need to do any pipe threading. I just drilled the holes to fit my drain. One hole will easily drain the lead but I cut two because I wanted the drain pipe to be welded at two points for strength. The last thing you want is a weld to crack and have all your lead contaminated in a pile on the ground.
The Pour
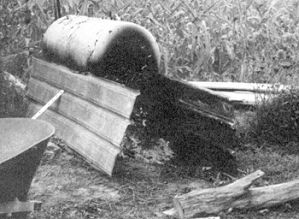 The scrap roof
concentrated the heat so that 2,000 pounds of lead were molten in two hours,
using less wood than I anticipated.. The scrap roof
concentrated the heat so that 2,000 pounds of lead were molten in two hours,
using less wood than I anticipated.. |
Because the bathtub in the WoodenBoat article lost so much heat from its surface, it seems the author could not melt more than 500 pounds at a time before the heat loss from the large surface area equaled the heat produced. With a closed tank, I was able to melt the entire 2,000 pounds of lead as fast as I could wheel loads of lead the 250 feet from my garage to the tank. In less than two hours the entire ton was molten. I made a lid of the 8" x 14" cutout so the tank was closed. That kept the heat in and probably a lot of things you would not want to breathe. And, there was no enamel flying.
I should note here that I am not criticizing the boatbuilder who used the bathtub. He, like all of us, made do with what he had, and he ended up with a usable keel. I am just glad he was willing to share his experience with the rest of us. I merely learned from his experience and improved on the process. I hope that someone reading this can do the same and the next builder will not fret pouring a lead keel.
My biggest fear was getting 2,000 pounds of lead to a molten state and then being unable to control it, either having it all leak out or having it stuck in the tank. My plumber neighbor had already saved a brass valve or two that I could use but I feared the heat would either crack and spill or freeze the valve into a closed position. The bathtub article saved the day. With the drain extending just past the end of the tank, all that was needed was another L fitting and a 5' pipe connected to it straight into the air. Lead stayed at the tank level and to pour I merely lowered the pipe. Be sure to set everything up so that the pipe pours directly into the mold, because once you start you won't be moving anything. No mechanical device to fail. Then the time came to lower the pipe and pour. The end of all my planning ... nothing!
No lead came out! Panic!
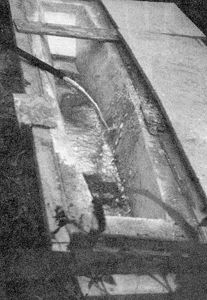 Here the molten
lead pours into the mold. Here the molten
lead pours into the mold. |
I have a friend who is a mason contractor. In the winter he uses propane torches to warm sand and brick and he loaned me two of them about 50,000 Btu's each. He thought I could use them instead of wood for the fire, but I had them there for a backup. A quick lighting of the torch and several passes over the drain pipe (another lesson from the magazine article) and suddenly the molten lead began to run out like water. Now there was no turning back. Just back up and watch.
Backing up was a good idea because my mold apparently had some moisture in it and as it got over half full there were several places where the surface exploded off, sending little showers of lead into the air. This is where the next generation will have to improve on my setup. My mold was made of brick mortar. While I also ended up with a usable keel, next time I might do things differently. With my lead in the mold, all I had left was a scrap tank, scrap pipe and scrap roof tin, which all went back to the scrap metal dealer it came from.
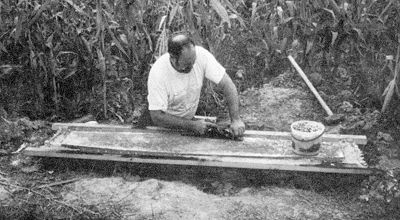 Once the top of the cement was chipped away, a plane removes excess lead. |
Let all the lead pour into the keel. Any extra will run onto the ground and after it cools you will find that the center shrinks in while the outside, which cools more quickly, stays slightly above the form. A little plan ing with a 14" plane and I had a good fit to the wooden keel.
Afterthoughts
To know how much your finished keel weighs, weigh the smaller amounts with a bathroom scale before you melt it. After you finish the pour, weigh the lead that ran out of the mold and onto the ground, subtract that number from the beginning weight and you'll have a pretty good idea what the keel weighs. Of course, you can always go find a truck scale.
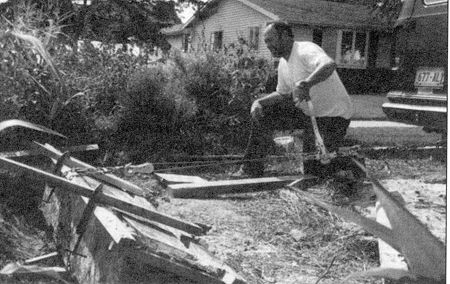 A cable
hoist was used to lift and turn the keel. A cable
hoist was used to lift and turn the keel. |
Be sure to plan ahead for moving the finished product. I don't have a tractor to pick up that kind of weight so I attached a chain to the bottom of the box before digging it into the ground. When the keel was finished, I backed my E-150 Ford to the site and with a 2-ton cable hoist between the trailer hitch and the chain I was able to roll the keel onto skids. I needed all the capacity of my cable hoist and had to block the truck wheels.
The last hurdle to prepare the ballast for attachment to the boat was to drill holes. Some of them required drilling through 8" of solid lead. Drilling through lead offers its own problems. Drill bits fill up deep in the hole and the heat from friction can weld your bit permanently into the larger mass. My solution was to begin with a traditional 1/Z" bit, being careful to withdraw and clean it before it could fill up, and dip it in ice water between drilling. After 4" to 6" I switched to a concrete bit. The tip is the only part that is as large as the hole, making it more difficult to permanently weld tight.
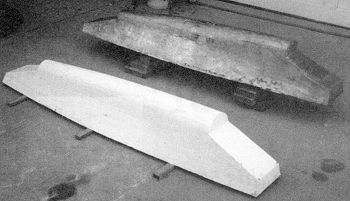 The finished keel mirrors the
cedar and glass mold. The finished keel mirrors the
cedar and glass mold. |
I hope that my experience recorded here will cause someone who was hesitant to tackle that special project to jump in with a new vigor. You can do it!