The Rob Roy as built by
Larry "Rehd" Brown, Fresno, Calif
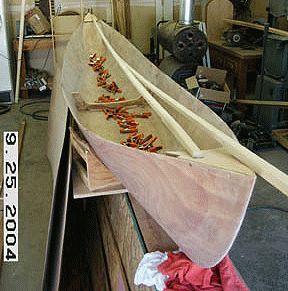
25 Sep 04:
Last night, I sanded the outer hull again, with 120 grit to get it smooth and
clean, and remove most of the scratches from the coarse paper.. What is left
will cover with the varnish. ( approx. 20 min. )
After washing off the dust and wiping it down I pulled it off the stands and
changed the stands to hold the boat up-right. No time available. This morning I
went out and cut my inner gunnals from the Poplar I bought last year.
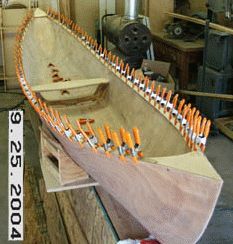 In order to get it to bend I had to cut it
down to 1/2" thick by 3/4". I had to do some fancy trimming to get it
to fit into the slots cut in the breasthook, and if I were to do it again... I
think I'd make the adjustments to the breasthook and not the strip. Mostly
because I had to unclamp and unbend it to work on it each time... there are
compound bends here. ( in and out / up and down ) What a pain. :-p Only after I
did the first one did I think of taking a chizel to the inside of that slot and
opening it up a little. Live and learn. My joints didn't turn out as good
as I'd have liked, so I will have to use some thickened epoxy (colored with
the sawdust mix I've used on the rest of the boat) (approx. 2 1/2
hours)
Got some last minute trimming done on the inner gunnals and mixed up some
Dookie-Schmutz (epoxy and saw-dust/micro-balloons) and started smearing it all
over the place. Well, mostly on the gunnal and inside lip of the 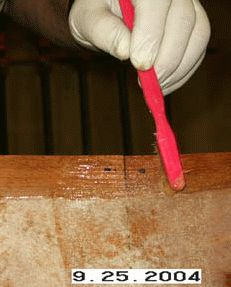 canoe... but I managed to drip it on the canoe
and the workbench?? I spread it thin on the strip and then went to the boat and
applied it to the inner lip on one side. Then, with the excess I went back to
the strip, which had soaked up a good part of the first layer, and applied the
remaining mix.
I found that an old tooth brush worked exceptionally well for this. And I fould
out over the past months that I wasn't working on the boat that I
didn't have to toss my brushes away every time. I used Plain White Vinegar
and it cleans up the epoxy on brushes very well. As long as you don't let
it start to kick off while on the brush. So, I did the whole job with one brush
and it's cleaned and ready to go on the next application.
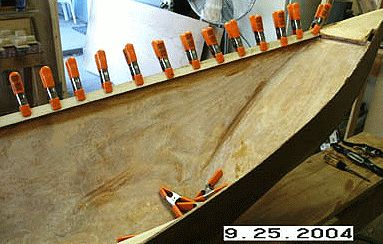
I went to the boat and stuck the strip into one breasthook and clamped it
there. Then went to the other end, bent the strip and stuck it in that
breast-hook. Moved over to the center and clamped it in the middle, making sure
that I had an equal amount of bow on each side. Then, just worked along the
side of the canoe and clamped it all down. When I got towards the ends, I had
to remove that clamp and allow the bow to come out of the strip and it slid
further into place. Do to my error I had about 1/167quot; gap at all four ends
:( Supposed to be a snug fit! So, I will have to use some Real Thick
Dookie-Schmutz to fill the gaps and sand it to flush. Calculating that bend
wasn't as easy as I figured. Plus, I spent some time unclamping and
reclamping to get it all relatively even. I repeated the process for the other
side and now that job is completed until final sanding and Varnish application.
One other thing I noticed while doing the inner strips was that it showed how
uneven my sides were, mostly in the center. Possibly do to over sanding when I
was trying to get my joints even and smooth. Bending the Poplar along the edge
gave me a more true line around the side of the boat, so when I get the clamps
off on Monday (I want to wait two days, just for insurance sake, as there's
a lot of torque on those strips) I will run the block plane around the edges
and get them even. (approx. 1hr. 20min.) Now it's time for dinner. :)
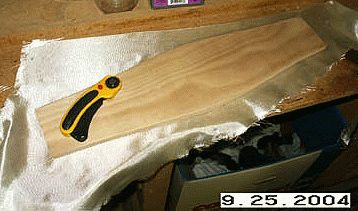 While the inner gunnals are curing I decided
to play with the seat, as it's the last thing that goes on, after the outer
gunnals and before varnishing. I cut some scrap 6oz. cloth that a friend gave
me. Layed it out for a little over hang ( bottom side ) all around and wet it
out. I set it aside on some waxed paper to cure. Then, I decided to add some
other seats that were given to me by a boat builder friend. I want to add them
towards the ends of the boat, one low and the other a few inches higher. I cut
out the low seat and got it approx. where I want it, but have to taper the
ends. When I add the third seat, at the other end. I will place it farther from
that end and a couple inches higher.
 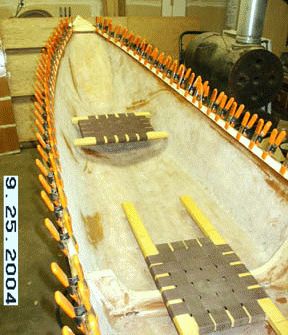 That, I
hope will give some variety to seat placement for different size single
paddlers and offer seats for 3 people in that case. I have 5 grand kids that
this boat is being built for and each weighs in less that 75 lbs. so 3 or even
4 of them would probably fit in there after they aquire some experience. Other
wise it will be myself and one or two of them. These extra seats will be
Velcro'd in and possibly made a little more adjustable with added velcro in
different areas of the hull. Or, left out completely if need be. Man, this
thing is going to weigh a ton. (approx. 1 hr.)
27 Sep 04:
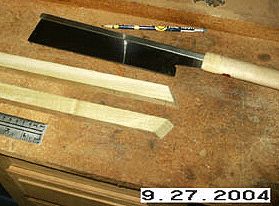 Pulled the outer Gunnals off the boat and
cut the compound angles on the ends with my Japanese Pull Saw ( look-alike ).
Love that saw! Then I measured and marked for the tapers on all ends. Once
marked I used my block-plane to plane down those tapers. Then, since I
didn't want them laying around to get stepped on, I clamped them back on
the boat. I also did some sanding on the Seat/Support piece and it's now
ready to install. ( approx. 2 1/2 hours )
9/30/04
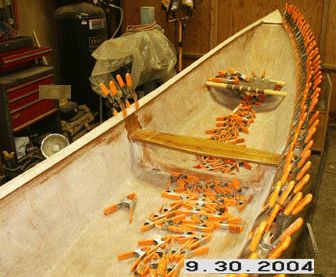 Last night I didn't have too much time
but I managed to glue the seat/support in the canoe. I used thickened epoxy to
attach it to the support and side panels. I also added some filler around the
edges. Tonight I went back to the seat and sanded a little and applied some
glass cloth from the seat to the side wall. I also applied a fill coat to the
top of the seat. A total time ( approx 45 min. )
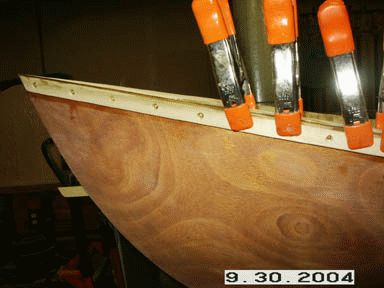
Also, tonight, I sanded the outside edges on the O. Gunnal strips and attached one. I mixed some epoxy and applied it to the inside of the strip for one side of the canoe. Then, went back and added more epoxy to the mix. I thickened it with my filler powder and applied it to the outer edge of the canoe... then added some to the inside of the strip. I stuck the strip on the canoe and started clamping. Once I got it positioned where I wanted it I got out the drill and screw tips. I drilled holes (which I had previously measured and marked) and then went back a few at a time and put the screws in. (approx. 2 hrs)