Building the Glen-L 14 - Part 1
by David Williams
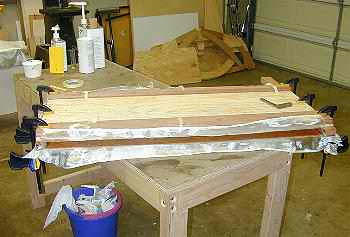
Page 3The end result was OK, I think. See Photo 4
I didn't get the pieces of the trunk exactly even fore-aft, maybe 1/8" off. This will be easy to trim. But I did get it right top to bottom where it would show, so all is well.

Photo 4. Fiberglassing the Centerboard Trunk
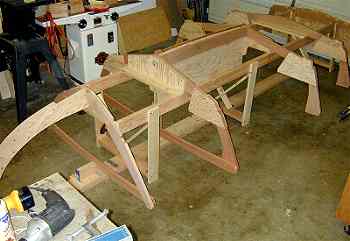
6/3-5: Set up the building form and mounted the frames. The crate the frame kit came in provided all the 1-by material needed, but I had to buy some 2x4 and 2x6 material long enough for the form. [$10]
I fastened the 2x6 to the floor with expanding bolts. Easily done, but my wife Ginette came in as I was drilling holes into the floor of the garage. Well, I won't go into that.
I spent some time leveling the form - a 6' level helped. Then I mounted, braced and centered the frames per the plan, attaching the CB trunk, stem and breasthook. The only tricky part was the transom. It is hard to get it the right height, distance and angle all at the same time, and centered and braced as well. But it is done now. See Photo 5. My wife said it looked like a museum dinosaur bones display.

Photo 5. Frame Kit on Building Form
The Keel
6/11-14 Made my first official trip to get some boat lumber. We have a local store called The Hardwood and Hardware Company (used to be called Austin Hardwoods). They sell all the exotics. Their web site is www.th-h.com. I bought 17.6 board feet of mahogany, mostly Philippine, but some Genuine (Honduras) [$78.40]. One piece of 5/4 was perfect for the keel, around 5" wide and 12' long.
I ripped it to 4" width and beveled it per instructions 7 degrees. I then cut the hole for the CB trunk by raising my table saw blade all the highest position and marking the front and back of the blade on some tape attached to the fence. Then, with the keel blank lined up at the back of the slot, raised the blade all the way, pushed the blank forward and stopped the blade. Then I flipped the blank to the other edge, and repeated the operation for the other side of the slot. I finished the cut with a jig saw. Fit perfectly.
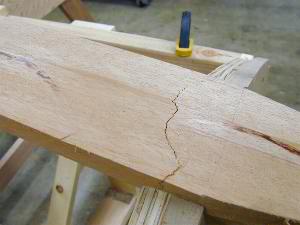
Then, I busted the keel!

Photo 6. Cracked Keel
In bending it over the frames, it didn't quite fit the slot in the stem. I cranked it down with a pipe clamp, stood back and said to myself, "This doesn't seem right."
Pop! I was right. See Photo 6. The keel cracked where it passed over the forward-most frame (#4). I had attached the stem in the wrong place. It should have been attached level with the top of the frame 4 floor member (remember it is upside down, so this is the bottom as it sits on the building form). I attached it even with bottom of the floor. So there was a much greater bend in a shorter length than intended. I had rolled up the pattern sheet because it takes up a lot of table space. Looking at it now clearly showed what I should have done at first. My fault.
So, now what to do. I wanted to save the keel. It fit the CB trunk so well, and I didn't have any more 5/4 material. I emailed Glen-L with some ideas, assuming they would tell me just to replace the whole piece. Actually, they agreed with one idea - cutting the keel in two at the middle of the CB trunk, and butting a new piece at that point. The CB trunk bed logs make dandy butt blocks.
I laminated up a 4' blank from two 1x boards for a 1-1/2' net piece.
I am going to try to fit it next - stay tuned!