On the Mark: Frame construction
Continued...
Adding gusset filler blocks
This is a step not shown in the plans. The plywood gussets are left open in the plans. I did not like this for 3 reasons:
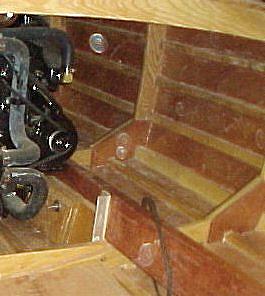 |
| Filled gussets, shown in assembled boat |
- The inside of the gusset area would be hard to coat and finish properly (remember I did an exposed interior)
- The plywood edges would be subject to getting dinged and nicked.
- I had a vision of wedging my big toe in one of them and reshaping it (my toe that is). We use the boat as a ski boat, it definitely pays to make the interior "foot friendly". Slipping around while wet, we do seem to find any sharp or non-rounded areas. I am fond of the skin on my feet, elbows, etc. Sharp corners not only add to wear and tear on me, but they also get dinged and damaged more quickly as well.
The fix for this is to add filler strips to close off the gussets. These are quickly made from the scraps left over from the frames and provide a nice finished look to the frames. It is best if you do not leave internal voids that could hold water.
Assembly and fixturing
 |
| Click to
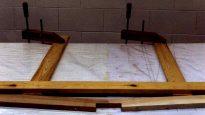
enlarge The frame jig. The horizontal piece holds the bottom/floor gusset in alignment. |
The worktable and plans become the surface for alignment of the frames during assembly. Even with well fitted joints, free hand assembly can add noticeable error and result in frames that are "racked" out of shape. To avoid this, the frames are best assembled on top of the layout table and plans. The pattern traced on the table forms one half and the reverse side of the plan is the other. Punch holes in the plans at the centerline to aid in alignment of the centerline of the table and that of the plan. This provides a "bulls-eye" which makes for easy alignment.
 |
|
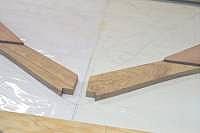
Frame pieces on table |
Place a sheet of clear polyethylene (6 mil is good) over the table and plans to protect them from the glue.
Lay the frame pieces out on the table and trim any joints for a good fit. Slight gaps under the gussets will be hidden and can be filled with the thickened epoxy at glue-up time.
|
Frame with gussets at end
of test fitting -
Ready to glue Click to enlarge |
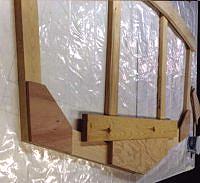
After you have checked the fit, you will need to remove the pieces, coat with glue (thickened epoxy) and then replace and realign them. I used the simple jig shown above (3 1x4s screwed together and clamped to the table top) to align the bottom batten (it is critical for proper frame alignment on the stringers). Another builder (Mark Johnson) suggested a method of screwing down small strips along the edges of the frame members during the testing phase. Then when you apply glue, you simply drop the pieces in between the strips and every thing is held in alignment. This is similar to what welders do for holding pieces in alignment on a work table prior to welding.
After the frame pieces are aligned, add the gussets. I used staples and screws to hold them in place. Keep the fasteners at least 1.5" away from the edges and out of the area of the chines and keel. If you are not careful, you will need to saw, chisel or route through them at a later step (Yes, I did). Having lots of metal fasteners left in near the edges is highly conducive to needing learn to sharpen edge tools more quickly. You will also usually find them with your newest tool or router bit. (Once again, today found buried metal on 3rd board after installing new planer knives.)
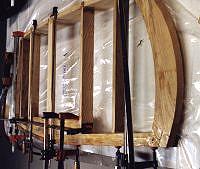
When clamping the pieces together, they can either be hung off the edge of the table and clamped (which I did) or you can add clamp bars across the joints and screw the works down to the table (another Mark J. suggestion).
If you are going to use the table for clamping, it is probably best to get your initial tracings done all at once to avoid plunging the pencil through the paper.
|
The transom in final
stages of assembly.
It is a complicated piece. Start with middle frames and leave this one for last. Click to enlarge |
Don't forget to not glue the removable carlings! I wrapped the ends of these in plastic packing tape as soon as they were cut out to avoid inadvertently permanently attaching them to the rest of the frames. This could happen either due to error, by building them like the others or glue running into the joint during the placement of the sheers and planking. When I removed mine, there was some glue behind two of them. It would have been very hard to get them out if the tape had not been there.
Pre-coating
The completed frames are then cleaned up and the inside edges are sanded/rounded over. Use hand planes, rasps and sander to get the profile nice. Pre-coat the frames, except for the outside edges. I hung the frames on wires from the ceiling joists. I let one corner touch the concrete floor to reduce spinning and make it easier to coat. Once dry, clean off the drips and scrub off the blush (if any) and sand to 80 grit again. You could do another coat, but I think they should be ready for assembly on the stringers at this point. Note- where the frame touched the floor, small chips of concrete were removed. Once again the epoxy is stronger than the base material.
Marking the edges
Take a black magic marker (or other dark color you prefer) and mark the outside edges of the frames. Just wash on a lot. Later when you fair the completed frame, you will reduce this wide black band to a pencil width line. Keeping the line on, helps ensure that you don't go too far.
Next 2 articles: Frame and stringer assembly and Inboard drive train setup (order undetermined)
We are very pleased to have Mark sharing his expertise with his fellow boat builders. If you would like to comment on this article to Mark, he can be reached at "builders at bronkalla.com". Replace the at with @. (Just trying to dodge a few spammers). See Mark's great web site for information on his Riviera project.
