
General Hardware Locations
Not all parts listed are used on both designs. The parts pertaining to the spar are for a wooden spar, when using the aluminum spar some of these parts will be replaced by spar kit hardware. See spar instructions. Although fastenings are listed for some parts they may not be correct if hardware suppliers change.

1. Gudgeons & Pintles (connect the rudder to the boat; the pintle is the part with the “pin”): Locate pintles on rudder approx. 14″ apart, the long pintle on the bottom. Hold rudder to vertical centerline of transom, slip gudgeons all the way onto the pintles and mark screw hole position on transom. Bolt pintles to rudder with 10-24 round head machine screws. Fasten gudgeons to transom with 10-24 machine screws or #10 round head wood screws. The rudder stop (angle) will mount to transom centerline approx. 5/8″ above top gudgeon with a #6 round head screw. Do not tighten all the way, it should easily pivot out of the way when the rudder is installed. This piece is meant to keep the rudder from floating out.
2. Gooseneck (connects the boom to the mast): Slide sail into mast, attach gooseneck to the grommet near the mast, pull sail taught and mark screw holes. Fasten with to mast with #8 x 1 1/4″ round head wood screws; to boom with 10-24 round head machine screws.
3. Outhaul & Halyard Cleats: OUTHAUL-Belays to aft lower corner (clew) of the sail to provide tension. Locate on side or bottom of the boom approx. 8″-10″ forward of the aft end. HALYARD-Locate at a convenient height above base of mast. Used to belay halyards. Fasten with #8 oval head wood screws.
4. Mast Tangs (straps used to attach shrouds to the mast): Do not install until you have the shrouds and forestay. Tape them in place and check location before drilling holes. Through bolt with 1/4″ carriage bolts.
6/18. Toggles: Used on masthead fitting per Plansheet 5.
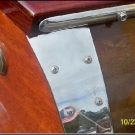
7. Chainplates/Covers (stainless steel straps used for a variety of purposes, in this case, to connect the shrouds to the boat): It will be necessary to drill additional holes in chainplates; should stick approximately 1″ above deck level. Bolt per instructions, to frame or blocking. Covers slip over chainplate and fasten with #8 screws. Requires blocking beneath deck.
8. Masthead Sheave (the halyards rides in these sheaves for raising the main sail and jib): Mount at the top of the mast per Plansheet 5.
9. Cheek Block: Mount in center of aft deck (leaving room for Deck Cam Cleat forward. Fasten with #8 Round head wood screws. Provide blocking beneath deck.
10. Bow Plate: (17 only) Locate on deck, above the breasthook. Screw in place with #8 x 1 1/4″ (or longer) round head wood screws. (21CB only) Stemhead Fitting angles down the stem where additional fasteners will be used. May require bending to fit stem angle.
11. Deadeye Strap: Located on the port side of the aft deck. For belaying mainsheet (see 14)Provide blocking beneath deck.
12. Deck Cam Cleat: Install in the center of the aft deck, forward of the Cheek Block. Provide blocking beneath deck.
13. Sheave Box: These are exit blocks for internal halyards. Mount on each side of the mast at a convenient height for handling the lines. Fasten with #8 x 1″ round head wood screws.
14. Swivel Stand-up blocks on Deck Plate (for controlling the mainsheet): Mount on the starboard side of the aft deck (blocking required). Fasten with #10 oval or flathead screws or 10-24 machine screws. The mainsheet (line) will deadend to the Deadeye Strap at the port side, lead through the Side Shackle Block on the end of the boom, to this stand-up block, aft to the Cheek Block, forward to the Deck Cam Cleat.
15. Side Shackle Block: Hangs on the boom bail at the end of the boom.
16. Boom Bail: Mounts on the end of the boom. Fasten with #10 x 1 1/2″ round head wood screws or through bolt.
17. Fixed Spreader Fitting: Mount on either side of the mast per plans. Fasten with #8 x 1″ round head wood screws. The jib sheet (line) will be threaded through the aft grommet of the jib and tied so that equal lengths can thread through the eyes on the jib slides. When coming about, one side will be released and the other hauled in.
18 & 19. Jib Cam Cleat with Track: For controlling the jibsheet. The track should be located approximately where shown on Plansheet #1. Fasten with #6 x 1″ pan head wood screws. Provide blocking beneath deck. Use #8 round head screws for track stops. See “Determining jib sheet lead for locating hardware” from Hardware Notes Index.

