Replacing Sacrificial Anodes (cont'd)
Step 2
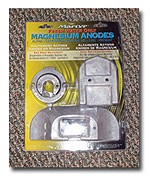
Next, determine which anodes are most appropriate for your boat. Some stores, like West Marine, offer technical advice on how to choose and install them. If
you're a saltwater boater, you can choose to install either
aluminum or zinc anodes - however, aluminum anodes last longer
while also providing the same level of protection as zinc. If
you're a freshwater boater, then magnesium is the correct
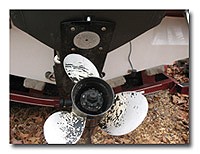
choice. The project boat pictured above is a 2001 Tahoe 202 deck
boat with a MerCruiser Alpha One Inboard/Outboard. For this
particular motor, Boating World magazine purchased a
freshwater kit that had all of the different anodes. Before you
begin, you'll need to pull your boat out of the water and
clean the lower unit. The tools needed are an American socket
set, a prop wrench (or appropriate-sized socket for your prop
nut), and an Allen wrench set.
choose and install them. If
you're a saltwater boater, you can choose to install either
aluminum or zinc anodes - however, aluminum anodes last longer
while also providing the same level of protection as zinc. If
you're a freshwater boater, then magnesium is the correct
choice. The project boat pictured above is a 2001 Tahoe 202 deck
boat with a MerCruiser Alpha One Inboard/Outboard. For this
particular motor, Boating World magazine purchased a
freshwater kit that had all of the different anodes. Before you
begin, you'll need to pull your boat out of the water and
clean the lower unit. The tools needed are an American socket
set, a prop wrench (or appropriate-sized socket for your prop
nut), and an Allen wrench set.Step 3
First, remove the old anodes. You'll need to remove the propeller to get to the bearing carrier anode. Place the engine in gear to keep the propeller from turning. There's a locking washer on the propeller nut. You'll need to pry the tabs up with a screwdriver before
loosening the propeller nut. Once you've done this, remove
the propeller. Loosen the two bolts, and the anode should come
off. You might have to gently pry it loose with a screwdriver.
Next, take off the anodic plate, which is located under the
lower unit. Remove both trim cylinder anodes. To remove the trim
tab anode, you'll need to pry the rubber boot on top of the
trim tab with a screwdriver, and then use an Allen wrench to
loosen the bolt. Last is the gimbal housing anode, under the
lower unit close to the transom. A small gasket may be stuck to
the gimbal housing, so be sure to remove it.
tabs up with a screwdriver before
loosening the propeller nut. Once you've done this, remove
the propeller. Loosen the two bolts, and the anode should come
off. You might have to gently pry it loose with a screwdriver.
Next, take off the anodic plate, which is located under the
lower unit. Remove both trim cylinder anodes. To remove the trim
tab anode, you'll need to pry the rubber boot on top of the
trim tab with a screwdriver, and then use an Allen wrench to
loosen the bolt. Last is the gimbal housing anode, under the
lower unit close to the transom. A small gasket may be stuck to
the gimbal housing, so be sure to remove it.Step 4
Once the old anodes have been removed, it's time to begin installing the new ones. Clean all the exposed engine parts. Be sure to use new bolts and lock washers. Replace the bearing carrier anode first. When replacing the
propeller, be sure to tighten the propeller nut flush and snug,
and don't forget to bend down the locking tabs. Next,
replace the anodic plate, and then replace the two trim cylinder
anodes. Return the trim tab anode to its original position, and
tap the rubber boot back in place with the screwdriver's
handle. Finally, replace the gimbal housing anode, and be sure
to install the new gasket between the anode and the gimbal
housing. You're now good for two or three years, depending
on the frequency with which you use your boat during the
season.
Replace the bearing carrier anode first. When replacing the
propeller, be sure to tighten the propeller nut flush and snug,
and don't forget to bend down the locking tabs. Next,
replace the anodic plate, and then replace the two trim cylinder
anodes. Return the trim tab anode to its original position, and
tap the rubber boot back in place with the screwdriver's
handle. Finally, replace the gimbal housing anode, and be sure
to install the new gasket between the anode and the gimbal
housing. You're now good for two or three years, depending
on the frequency with which you use your boat during the
season.Reprinted from Boating World, April, 2008.